Outlining an image in GIMP is one way to create a cool sticker or stencil effect. A good image outline also brings you one step closer to creating custom clipping masks and vectorized shapes which you can use in more detailed graphic design projects like making icons, patterns, or pixel art.
For best results, start by creating a transparent background around the object you would like to outline. This can be done by deleting the background or by cutting the object neatly out of the image.
With the ‘Fuzzy Select’ Tool or the ‘Select by Color’ tool, you can easily select and delete the background of an image. See detailed tutorial HERE (Link). And to cut objects out of the background, you can either use the ‘Scissors Select Tool’ or the ‘Freehand Select Tool’ to carefully plot your way around the edges of the object and copy it onto a transparent background.
This tutorial shows you how to create an outline around an image on a transparent background.
Step 1: Launch GIMP
Step 2: Open image with transparent background.
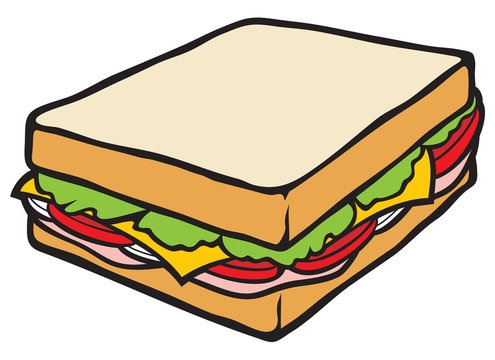
For this tutorial, I will create sticker effects with one object on transparent backgrounds. The object is a sandwich.
Step 3: Go to the Layers panel and create a new layer with transparent background.

Step 4: Lower the new layer by dragging it beneath the image layer so that it becomes the background.
Step 5: Right-click the image layer and select ‘Alpha to Selection’. This will select and highlight the object on the transparent background with moving dotted lines.

Step 6: Go to the ‘Select’ tab and click ‘Grow’. This tells GIMP how much to extend the boundaries of the selection beyond the image.
Step 7: Set ‘Grow Selection by’ to 20px and click ‘OK’.

For this tutorial, I have used 20px for the image of the sandwich because there’s a lot of space around it, and the selected area does not extend beyond the canvas.
Step 8: Activate the ‘Paint Bucket’ tool

Step 9: Set paint color as desired. I’ve set my foreground color to yellow for the .Step 10: Then select the background layer. It will have a darker color once selected.
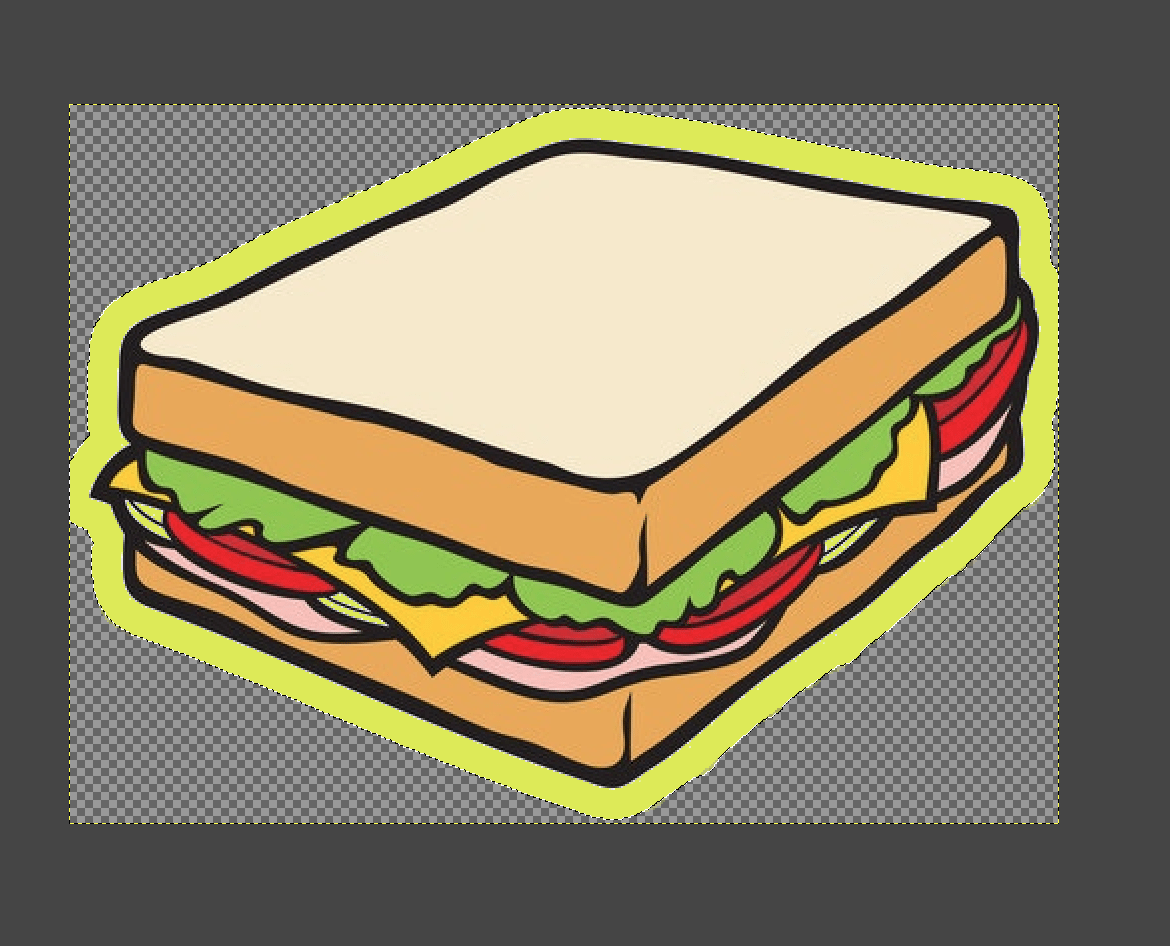
Step 11: With the background layer selected, click or drag the ‘Paint Bucket’ tool over the canvas. This will fill the outlined area of the background layer with the foreground color.
To save your outlined object, first, merge the layers and then go to ‘File’, ‘Export as’, and save the picture in PNG format to retain transparent background.
Alternatively, you could delete the image layer and export the shape with color fill on a transparent background so you can vectorize it and use it in other creative projects.
